
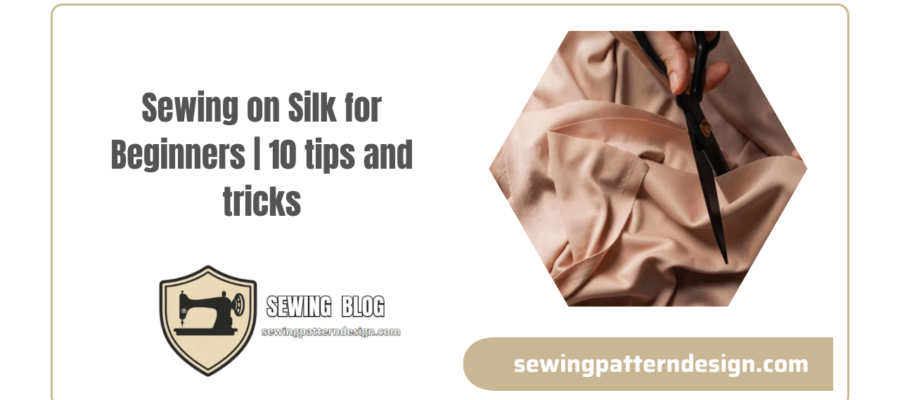
Why is it worth sewing with silk and how to overcome the fear of this fabric? Sewing silk is the gateway to the next level of sewing mastery. This luxurious fabric is associated with elegance and comfort and clothes made from it are extremely gentle on the skin and fit beautifully. But many beginners like you are afraid of working with this material. The myth about its difficulty is common, but in reality it arises from ignorance of some fundamental rules. This step by step guide will show you that sewing silk is within your reach.
Breaking the myth of heavy fabric
The main cause of silk’s problems is its delicate and slippery structure. The fabric can come out from under the scissors, tear at the edges and curl under the machine needle. However, these challenges don’t mean the material is impossible to master. All you need is the right preparation, the right tools and a little patience. Each of the problems has its own simple solution, which you will learn later in the article. Instead of seeing silk as an enemy, see it as a material that requires understanding and finesse.
Luxury and comfort at your fingertips
Imagine a dress, shirt or silk scarf sewn by you. It is not only a great satisfaction, but also an opportunity to create clothes that fit you perfectly with the highest quality materials. Silk is spacious, hypoallergenic and reflects light beautifully, giving any style a noble character. Learning to sew with silk opens the door to the world of high-quality fashion. Investing time in learning this skill will pay you back many times over in the form of unique and long-lasting garments.
Understanding the nature of the material as the key to success
Before you start sewing, take some time to familiarize yourself with your material. Touch it, see how it builds up, how it reacts to bending. You’ll notice that silk is lightweight, flowy, and prone to shedding. It is these properties that require a different approach than stable cotton or knitwear. Realizing that its slipperiness is not a flaw, but a natural quality, changes your whole attitude. Your goal is not to fight the tissue, but to work with it using the right techniques.
Step 1: Proper preparation of silk fabric before sewing
The preparation of materials is the basis of a successful project. Skipping this step is one of the most common mistakes that lead to frustration and problems later in the sewing process. A properly prepared silk fabric will be more stable, easier to work with and more predictable. Taking the time to do this step will save you a lot of nerves and give the finished piece a professional look. It’s an investment that always pays off.
Soft decay of the material
Decanting is very important, i.e. maintaining the temperature and humidity of the fabric before cutting. Silk, like any natural fiber, can shrink after the first wash. Imagine spending hours sewing the perfect dress, only to find it too small after washing. To avoid this, you need to prepare the material. The safest way is to wash your hands in warm water with a mild silk detergent or baby shampoo. Avoid strong friction and twisting of the fabric.
Drying without risk of damage
The way silk is dried has a huge influence on its appearance and structure. Never dry silk in the dryer or in the sun, as this may damage the delicate fibers and cause discoloration. After gently wringing out excess water with a towel, hang the fabric flat or on a large, round hanger, away from direct heat sources. Leave to dry naturally. Correct drying prevents the formation of wrinkles that are difficult to remove and the deformation of the material.
Pre-ironing as a stabilizing element
It is best to iron silk while it is still slightly damp. Set your iron to the lowest temperature for silk and always iron the fabric from the inside. Using a dry, clean cotton fabric as a protective layer between the iron and silk further protects the fabric from shine and water stains. Carefully leveling the material before cutting will make it more stable and easier to cut accurately.
Choosing the perfect tools: which needles, threads and scissors to choose for silk?
Working with silk requires precision, which is guaranteed by the right tools. Using dull scissors, needles that are too thick, or the wrong thread is an easy way to destroy fabric. Investing in some specialized sewing accessories is a small price compared to the cost of the material itself. Good tools will not only make your work easier, but will also ensure a professional and aesthetic appearance of seams and edges.
The importance of sharp cutting tools
Silk tends to fray and shift when cut. Very sharp tailor’s scissors or a circular knife with a new blade are therefore essential. Blunt tools will tug and tug at delicate fibers, causing jagged edges and damage to the material. Before cutting, make sure the scissors are for fabric only. Using them on paper or other materials will cause them to fade quickly. A circular blade combined with a self-healing mat is a great solution for minimizing tissue movement.
The needles are designed for delicate fabrics
The choice of needle is very important. A needle that is too large will leave visible holes in the silk and may pull individual threads, creating unsightly bands. Use only thin, sharp needles to sew silk. Microtex needles size 60/8 or 70/10 are the best choice. They have a very sharp and thin tip that precisely passes through dense fibers without damaging them. Be sure to insert a new needle before starting any new project.
Threads that work with the material
The threads should be combined with the lightness and delicacy of silk. Thick polyester threads can overwhelm the fabric and cause it to wrinkle. The best choice will be fine, high-quality cotton threads that are soft and blend well with natural fibers. Alternatives may be silk threads for a luxurious finish or very fine polyester threads from reputable manufacturers. The most important thing is to choose threads that do not dominate the fabric, but subtly bind to it.
Secrets of precise silk cutting: techniques that prevent slipping
Cutting is the time when it’s easiest to make a mistake. The slippery nature of silk makes it quite difficult to keep it in place while moving the design and cutting. However, there are some proven methods that will allow you to get perfectly tailored garments. The key is to immobilize the tissue and act precisely.
Single layer cutting method
While cutting multiple layers of material at once saves time, using silk is a straight road to disaster. The layers will definitely shift and the cut pieces will have different shapes and sizes. Always cut silk in one layer. This means that the pattern pieces that are normally cut onto the folded fabric need to be mirrored and cut separately. This takes more time, but provides the precision needed to achieve a professional final result.
Use weights instead of skittles
Traditional high heels can leave permanent holes in delicate silk or cause blisters. Instead of attaching the pattern to the fabric, use special sewing weights. You can buy them or make them yourself, for example, from large metal blocks. Spread the fabric on a flat surface, place the elements of the design on it and press them with weights. This will keep the material in place and avoid the risk of damaging it.
Stabilization of the cutting base
To further prevent the silk from slipping, you can prepare the base. A large self-healing mat is ideal because it has a slightly grippy surface. If you don’t have one, you can spread a large piece of cotton cloth or an old sheet on the table. The rough texture of the cotton will help keep the silk in place while cutting. Avoid cutting on slippery and painted surfaces, as this only exacerbates the problem of material shifting.
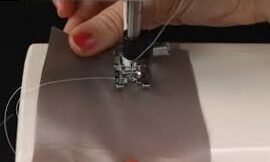
The basic settings of a silk sewing machine: stitch, tension and presser foot
Your sewing machine can work great with silk if you set it up correctly. The default settings, ideal for cotton, can cause puckering in silk, pull the fabric into the stitch plate, and twist the thread. A few minutes of machine adjustment is the key to smooth, even stitching.
Choose the right stitch length
Silk is a tightly woven fabric, so a shorter stitch is better. A stitch that is too long may look unsightly and will not provide enough strength to stitch. The optimal length of the straight stitch for sewing silk is approximately 2.0 mm. This length allows you to create a strong yet discreet connection that will not deform the delicate structure of the material. Always do a test cut of the fabric to make sure the stitch looks good.
Thread tension adjustment
Correct thread tension is very important to prevent puckering in the seam. Thin fabrics such as silk often require a slight reduction in upper thread tension. Too much tension will cause the seam to tighten and not lie flat. Make a test stitch on a piece of silk folded in half. If the seam puckers the fabric, gradually reduce the tension until you have a completely smooth and flat joint.
Put on the upper leg of the carrier
A standard foot may have difficulty gliding smoothly on slippery silk, causing the layers to shift relative to each other. The ideal solution is to use a foot with a top transport. This special foot has its own teeth that help move the top layer of material at the same speed as the bottom layer carried by the machine’s teeth. Because of this, both layers are fed evenly under the needle, eliminating the problem of creases and material slipping.
French stitching is the best way to professionally finish silk fabric
Finishing the edges with silk is extremely important, as this fabric has a high tendency to fray. Leaving rough edges on the inside of the garment is unacceptable. The most elegant and professional finishing method is the French seam. Although the name sounds complicated, it is actually a simple technique that gives a nice, clean effect.
What is a French seam?
The French seam is a technique that involves cutting the fabric inside the second seam. This results in a clean finish on both the right and left sides of the garment, with no visible frayed threads. This is ideal for sheer, delicate fabrics such as silk, chiffon or organza, where a standard overlock finish may be too heavy and show through.
Sewing a French seam step by step
French seam is performed in two stages. First, fold the pieces on the left side and sew them close to the edges, using a small seam allowance, about 0.5 cm. Then flatten the fabric, cut it in half and fold the fabric right sides together so that the first seam is exactly on the fold line. Smooth the edge and make a second seam, slightly wider than the first, about 0.7 cm from the edge. This way the first raw hem will be closed inside the second seam.
Advantages of using this technique
The main advantage of the French seam is its aesthetics. This ensures an extremely clean and professional finish that enhances the quality of the entire project. Furthermore, it is a very resistant solution, as the double stitching reinforces the joint and the raw edge closure completely eliminates the problem of wear of the fabric even after numerous washes. Garments finished in this way are equally beautiful inside and out, a hallmark of haute couture.
Latest posts

How to wash, dry and care for bedding?

Curtains are an exclusive highlight of home interiors

Restless children’s sleep

Satin care: tips and guidelines

Why are satin bedding sets so popular?

Home textiles for sensitive skin
How to choose a dress model?

Baby blankets: why are they important and how to choose them?

Herbs: Natural Ways to Improve Sleep