

What is an invisible zipper on clothing? By definition, an invisible zipper is a zipper/zipper intended to blend into the seam for a discreet, even almost “invisible” result. Present on most dresses, shorts, tight trousers and tight skirts, it allows you to gracefully close a garment without compromising the beauty of the model.
They come in all sizes: 15 cm, 20 cm, 30 cm, 50 cm… and in all shades! But the choice of length will depend on the clothing model and the fabric you have chosen! Of course be careful, the color is not the most important thing, because if the zip is well sewn, only the tab will be visible.
Is it difficult to sew an invisible zipper?
Often feared by beginners and even the most experienced seamstresses, this sewing step is nevertheless simple to perform once we have found THE right technique for us! With the right method and the right tools, it will be very easy to sew a perfectly invisible zipper on your clothes!
So let’s go! We reveal to you in images our favorite technique with our Crocus Bleu jacquard fabric!
Learn how to install an invisible zip step by step
Rappelling: Here is the technique we use in the Eglantine and Zoé laboratory. It’s not necessarily THE universal technique. So you can very well follow this or the other, or do a mix! The main thing is to find the technique that suits you best.
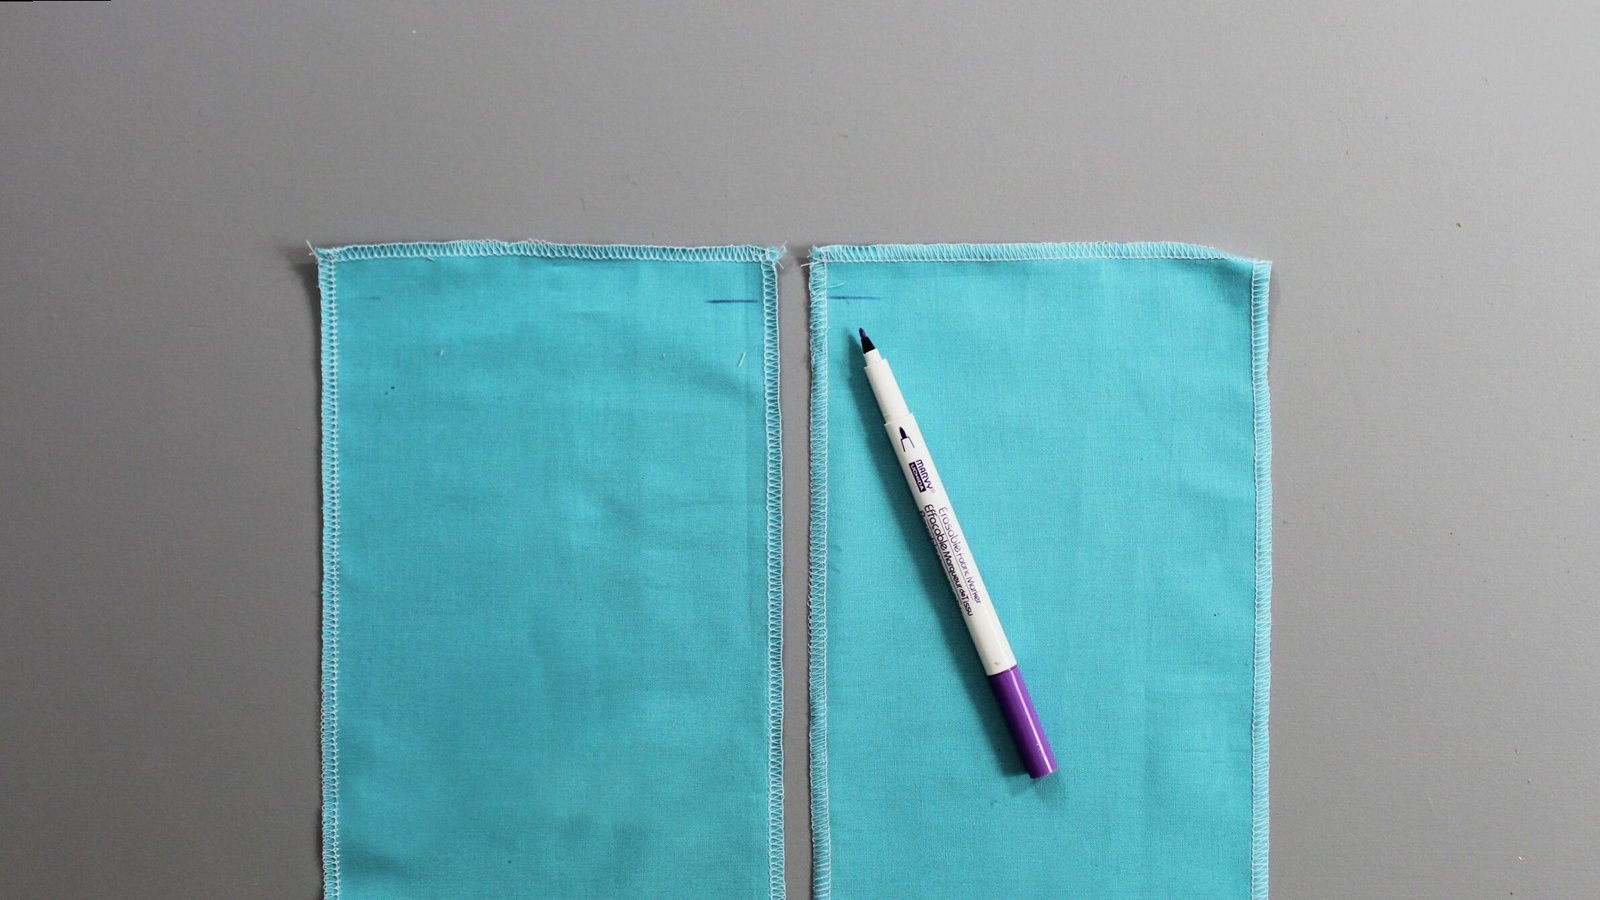
1. Cut and sew the side of the two pieces of fabric to be joined with the invisible zipper. This is an important step because you will no longer be able to refine afterwards.
2. With right sides facing you, place the two pieces of fabric seam side to seam side. Please note that if you can, leave the bottom of the zip seam open, we will close it later.
First side of the closure:
1. Simulate the installation of the invisible zipper at the notch indicated on the model to visualize the result once sewn. To do this, fold the seam allowance with your hands.
2. Hold the top of the zipper with the top of the fabric and open the zipper. You will then be able to see how the zipper should be positioned relative to your first side.
3. Pin or sew a full-length basting to hold the zipper in place.
4. Use a special invisible zipper foot.
5. Place the fabric under the presser foot. The teeth of the zipper must be well inserted into the corresponding groove of the foot. Here the left side of the zipper in the left guide of the presser foot.
6. Hold the threads at the back then start sewing with a bartack. As the presser foot advances, it opens the teeth and sews as close to them as possible. You can make starting the seam easier by holding the teeth open outward with your finger.
8. Continue to the tab and make a stopping point.
Second side of the closure :
1. Close the zipper and place it back under the second side to view the final installation. Be careful to place the two sides of the zipper facing each other to achieve well-aligned seams and perfect connections.
2. Hold the top of the zipper with the top of the fabric and reopen the zipper.
3. Pin or sew a full-length basting.
4. Check that the fittings are correctly aligned.
5. Place the fabric back under the presser foot and sew as for the other side. As you approach the foot, remember to keep the zipper teeth open outwards.
6. Once the stitching is finished, close the zipper with the right side facing you and check the result.
Finish:
1. You then need to close the lower part of the work. To do this: With the wrong side facing you, fold the end of the zipper up and pin it to hold it temporarily.
2. Then, right sides together, pin your work from the zipper to the bottom. The goal will be to extend the zip seam by machine or by hand.
3. Swap for a nice crowbar.
4. Starting from the bottom of the work, wedge the needle according to the seam allowances indicated by your pattern.
5. Make a bartack and sew lengthwise until you meet the zipper seam.
6. Remove the pin securing the hinge.
7. Turn the garment inside out to reveal the seam.
8. Iron for a clean finish, paying particular attention to the area where the two seams meet. We can clearly see that it was important to do the serger first because this way you get a nice open seam.
If you can’t sew by machine, you can sew the finish by hand.
Well done! You have a perfectly invisible zip!
And to discover the video tutorial, double click on the image!
Latest posts

How to wash, dry and care for bedding?

Curtains are an exclusive highlight of home interiors

Restless children’s sleep

Satin care: tips and guidelines

Why are satin bedding sets so popular?

Home textiles for sensitive skin
How to choose a dress model?

Baby blankets: why are they important and how to choose them?

Herbs: Natural Ways to Improve Sleep